
Images are one of the most striking components of any website. They attract users immediately and can help keep users on your page. In fact, branded images, like infographics, can also help with your website’s rankings. If your company creates their own branded images, when other site's link to your work, they can also link to your images. Therefore, it is very important for your business’ website to optimize images perfectly. Here, I will introduce to you some of the best tips for image optimization.
Give Images a Concise and Simple Name
When you upload a picture on your website, it’s important that you choose a simple and concise name for that picture because most searches online are made in simple words. You want the name of your image to be related to the image and an appropriate description for it. This way, Google can crawl your image and rank for appropriate words for your image. Remember, Google also uses your file names to search for keywords suitable for ranking on search engines.
Also on TechWyse
Tips to Optimize Website Design to Improve Ranking
10 Tips To Ensure Quality ROI Through Conversion Rate Optimization (CRO)
For example, when naming this photo for Toronto. You would want to create a descriptive file name to describe the image.
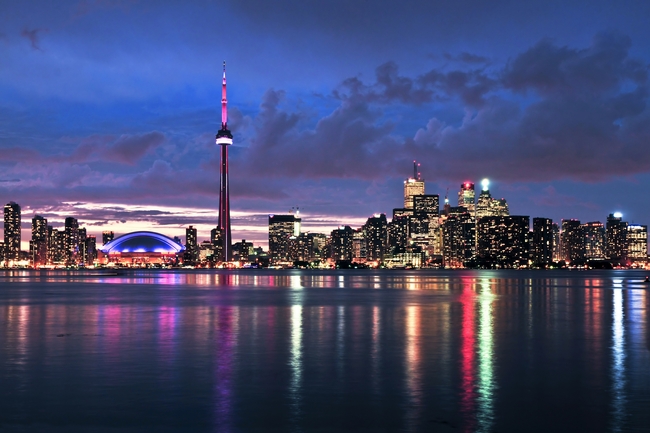
Rather than simply having "Toronto" as a name, consider the following variations:
- Toronto City Skyline
- Toronto Night City Skyline
- Toronto Nightsky Landscape
Choose Alt Tags Smartly
Alt tags and alt attributes are meant to provide an extra description to the image. It is very useful when the image doesn’t loads properly for someone, as it provides the information needed to describe what the image is. In some cases, it can also help those who are visually impaired to have the screen reader identify the image. Google too gives a large importance to these tags while ranking. Try to keep your alt attributes simple and to the point. It should be easily understood and appropriately describes your image.
Make Dimensions of Your Image
The formula is simple, the bigger the image, the higher the loading speed. This one statement expresses everything needed about choosing the size of the image. However, if you rely on content managing system or hosting software, your image may automatically get resized. Therefore, it would be better to upload the image with exact dimensions without keeping it free for them to resize it.
In addition, you want to avoid uploading small images because they may appear less visually enticing. To avoid overpopulating your site with small and low quality images, consider saving your images in different formats that are often smaller in size. This way, your image dimensions can remain in a larger dimension and higher quality.
Choose the Right File Format
JPEG is the file type that remains highly popular because it gives high-quality pictures in a compressed form, which makes your site load faster. However, it has one flaw and that is transparency. It has no transparency so any other person would find it difficult to edit its background in photo editor.
Another format that is good for your site is PNG and GIF formats. PNG stands for Portable Network Graphics, which is a great filetype for online imagery because they allow for transparency. GIF stands for Graphics Interchange Format, which have often been identified with moving/looping images. They are a great choice for small images and the need for transparency. They can help to reduce the file size, but the image quality of GIFs cannot compare with those of JPEG.
Reduce Image File Size
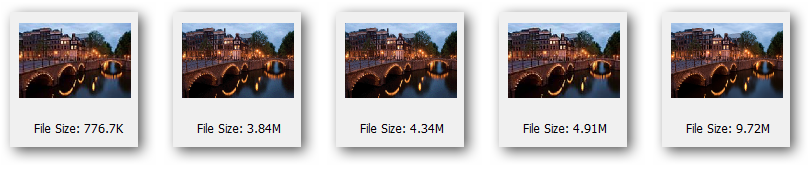
You’ll notice that images saved in different formats have different file sizes. Generally, those with a higher quality are often a larger file size. Unfortunately, images that are larger in file size will require more time to load. This can affect the loading speed of your website and could cause users to leave your site. Try to test your images and reduce the image sizes by changing their format.
Use Image Sitemaps
Make use of the Google Image sitemap to allow Google to recognize your site and the images on it. This will help crawlers crawl your pictures and for searchers on Google to find your images through the search engine more conveniently. In addition, Google requires you to have detailed filenames and alt text that are relevant and descriptive of your image. In the end, if you can provide good context for your image, the more likely Google is to recognize your images as a relevant image source for their users.
Examine The Working
With all the above tasks done, make sure you regularly check your website from the third party’s point of view. This will let you judge your site perfectly furthermore, nudging you to increase the overall site experience for customers. You will also able to test the number of images, the size of images, and the loading speed of the graphics on your website.


on
When choosing how to name your particular image, it’s best also to name it around the particular keyword of focus for the article, but not to over-do it and only frustrate users as well as search engines. Thanks for the share, good tips 🙂